Authentication with SSH Keys
Now that your development server is configured you can begin uploading your files to the server. For development we can create a login procedure that doesn’t require a password using SSH keyfiles.
Creating the private and public key
On windows, download the PuTTY Key Generator utility and generate a new public and private key.
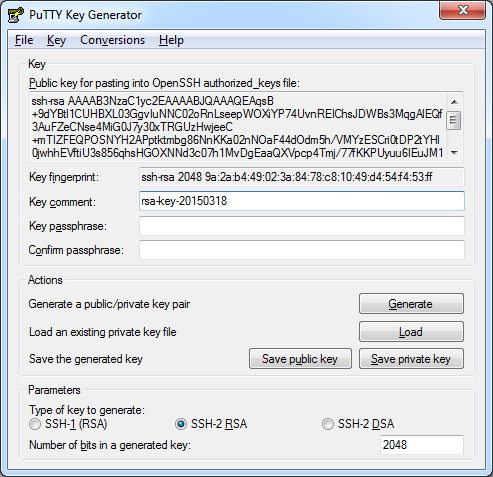
Save the private key. Software will use one of two different formats for the private key. Export both a ppk file and an OpenSSH key file:
File -> Save Private Key -> Save as private.ppk
Conversions -> Export OpenSSH key -> Save as private.key
Copy the public key to your development server’s authorized_key file for the user you want to authenticate. In our examples we will be using root. On a production server you shouldn’t login as root directly.
If the directory and files don’t exist yet you will need to create them with the following permissions:
cd ~/
mkdir .ssh
chmod 0700 .ssh
cd .ssh
touch authorized_keys
chmod 0600 authorized_keys
Copy the public key, changing the string to match your public key:
cd ~/
cd .ssh
echo ssh-rsa AAAAB3NzaC1yc2EAAAABJQAAAQEAz7tEMrKSSLiYi3vaYu71KQeK+VX0zA07Rc5ZyyenLvihXW3TR7y6Yz9sYMOSgWMewUWosXxGNy17XR2pJSRXtD6mIEcQmhJh47H99bJEHxQ3NOEsRcEwe1yn++T7Q4DthunxzxLY+1M85EYMemz1ato+E341zwEZj0KJr064K9MtrCvC86menKsUFeRoEoj5YafJ02PaUeZiweLw3VyLgmhDCnx3DuSrEtO2O0eBHrziycamrbTE5W69oh+SUpXwnWQEagbHVGGWtXKCYltMiD14rWdqSsrlkAeg2hmDdxuIEn5w41OWJjeVqkXBnA4Pvp+hnCZKQBlCtP2/aSkVaQ== rsa-key-20150318 >> authorized_keys
Troubleshooting
Sometimes things don’t go that smoothly. If you are having problems connecting your client to your server using your new private / public key pairing. Check out the log files on your server for clues on how to solve the problem.
tail –f /var/log/secure
Configuring your FTP client
FileZilla is a popular open source FTP client for windows. It supports SFTP as a method for transferring files between your computer and the server.
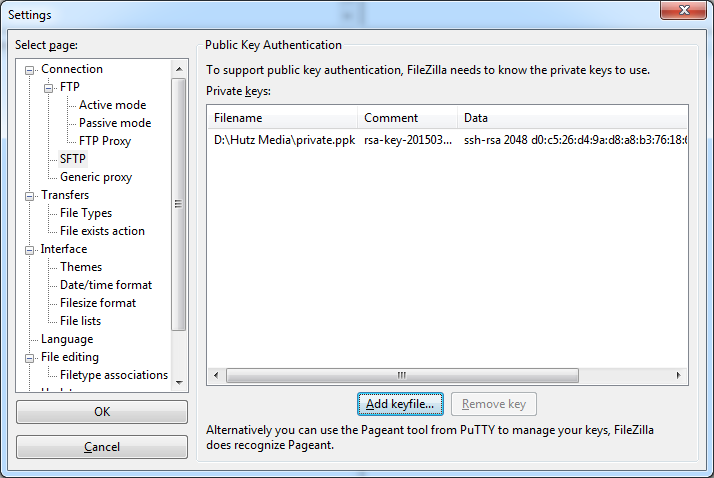
Add your private key to the SFTP settings.
Edit -> Settings -> Connection -> SFTP -> Add key file
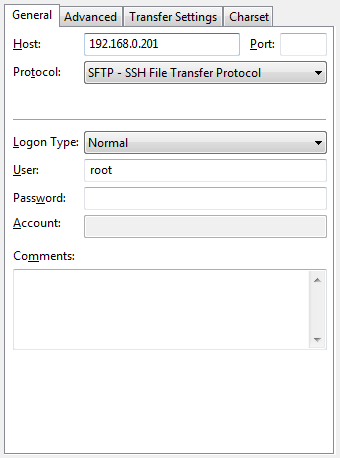
Create a new connection profile. Enter in your development server’s host or IP Address. Select SFTP as the protocol. Enter in your user but leave the password blank. On a production server it is not a good idea to connect as the root user.
Configuring your SSH client
PuTTY is an open source implementation of SSH for windows. It allows shell access to your server without having to access the development server directly. If using a virtual machine, it is more responsive than the VMWare window and is preferred.
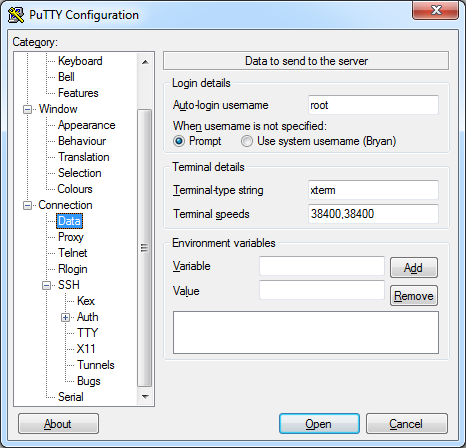
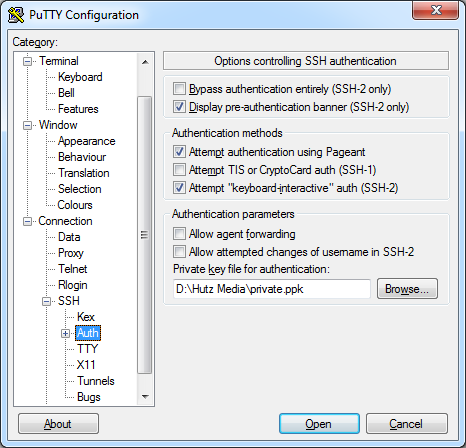
Set the default user to root and the private key file to private.key.
Connection -> Data -> Auto-login username
Connection -> SSH -> Auth -> Private key file or authentication
Configuring other clients
The setup procedures are fairly similar on other software. Remember that security is important on a production server. You should not be logging in a root directly. Nor should you be creating a passwordless private key when accessing your server. On a production server assign a password to your key.
 Bryan Wiebe is a web developer and mobile developer living in the Okanagan, British Columbia. He works for Hutz Media Ltd. This post is an entry in a blog series covering the configuration and setup of a Development Environment.