
Using a Virtual Machine for Development Environment
During development of web applications it is a good idea to use a development server instead of the live production server. There are many reasons for this such as a simple coding error taking down the entire production server and all of your client’s web pages with it.
You could try to running a web server directly on your Windows or MacOS operating system. However, this can be a pain to set up and get going and chances are that the differences in the environment between your personal OS and the production server will be enough to cause headache when it is time to deploy.
At Hutz Media, we use a dedicated CentOS Linux server running 24/7 for development and testing. For part time developers a virtual machine running in the background will work just as well.
We also CentOS on our production servers. I find that it is always best to have your development environment as close to your production environment as possible.
In this post we will be using VMware Player 7 to setup and install as LAMP web development environment for CentOS. You can also use VirtualBox.
Download CentOS
CentOS is a Linux project that is derived from sources freely provided by Red Hat. Download the latest minimal ISO image at http://www.centos.org/download/. The file should be around 566MB.
Create a New Virtual Machine
Once you have finished download the CentOS ISO image open VMware Player and create a new virtual machine.
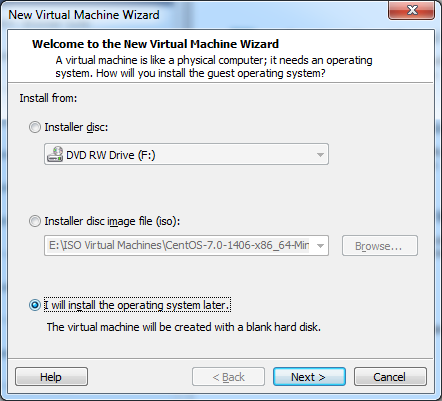
If using the Easy Install Wizard, VMware Player will try to install the GUI Desktop version of CentOS. We want to install the server version so we need to avoid the Easy Install process and install CentOS manually.
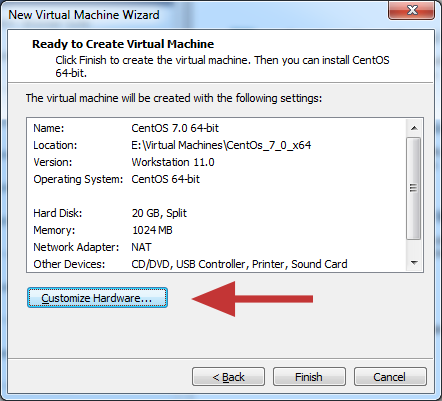
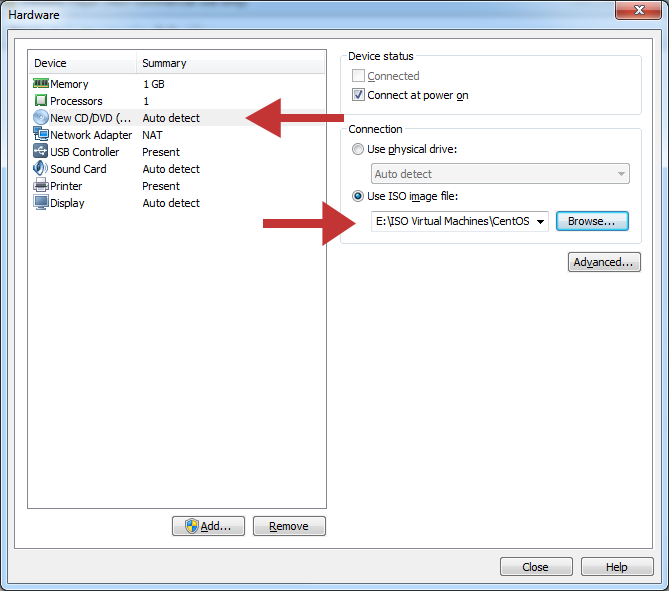
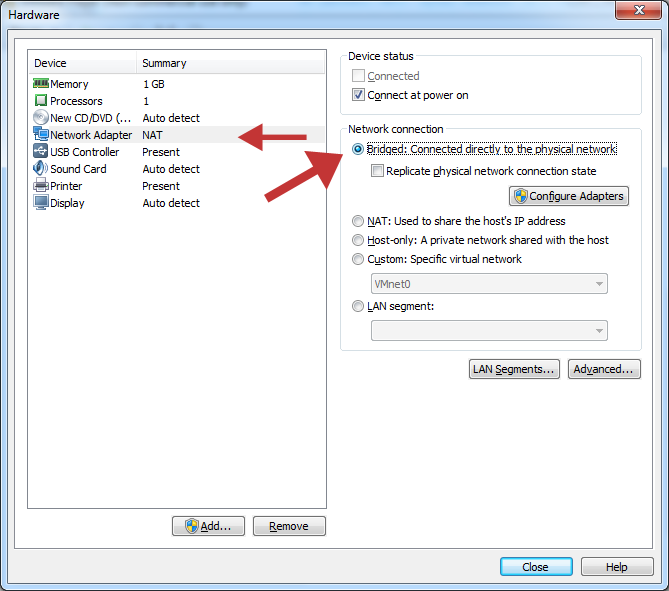
Select “I will install the operating system later”. On the next window select “Linux” and “CentOS Linux 64-Bit”. Under the Hardware settings window select the ISO you downloaded as the startup CD and also change the network settings to “Bridged”. Click “Finish” and power up the virtual machine.
Follow the directions to install CentOS. While it’s installing you can setup the root password. This should only take about 10 minutes.
Setting up network
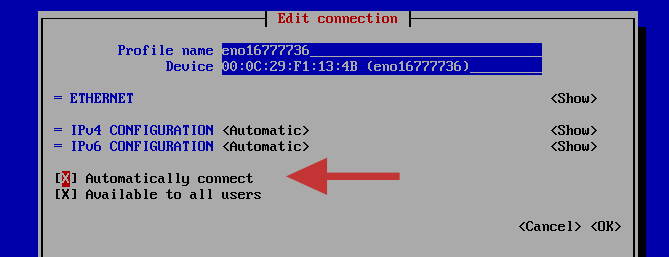
CentOS minimal is installed by default with the network turned off. Type “nmtui” in the console to get to the network adapter settings. Set the ethernet device to automatically connect through DHCP (or configure your connection manually). Restart the network service.
service network restart
Using yum to install services
Now that CentOS is installed on your new virtual machine it is time to get your web development services installed and ready.
First you will want to update your server. Using the virtual machine window and the username and password you setup in the Easy Install wizard, log into your root account.
Use the yum command to update your server software to the latest.
yum update
Now install the services you’ll need for your LAMP environment.
yum install php php-cli php-pdo php-mysql php-gd httpd mod_ssl mariadb mariadb-server
Starting and configuring services
Let CentOS know you want to start these new services on bootup.
systemctl enable httpd.service mariadb.service
Start the services.
systemctl start httpd.service mariadb.service
Allow http and https traffic through the firewall.
firewall-cmd –permanent –zone=public –add-service=http

firewall-cmd –permanent –zone=public –add-service=https
Test your new LAMP server. Find out your virtual machine’s IP address by typing:
ip addr
Open up your browser to http://MY_IP/. You should see the following page:

Your new virtual machine is now setup and ready for development. You can enjoy low latency development that is nearly identical to your production environment without any additional hosting costs or having to purchase a stand-alone server.