NetBeans on our Development Environment
What is NetBeans?
NetBeans is an open source IDE used for developing desktop, mobile, and web applications with support for Java, HTML5, PHP, C/C++ and more.
We will be configuring NetBeans to develop our web application on our development server. Our web application files will be on our computer’s hard drive and will automatically upload to the web server as we make changes so that our development environment is similar to the production environment.
NetBeans is my IDE of choice because of its strong support for code hinting and built in versioning (Git).
Create a new project
Step 1: New Project
If you haven’t done so already, download NetBeans here.
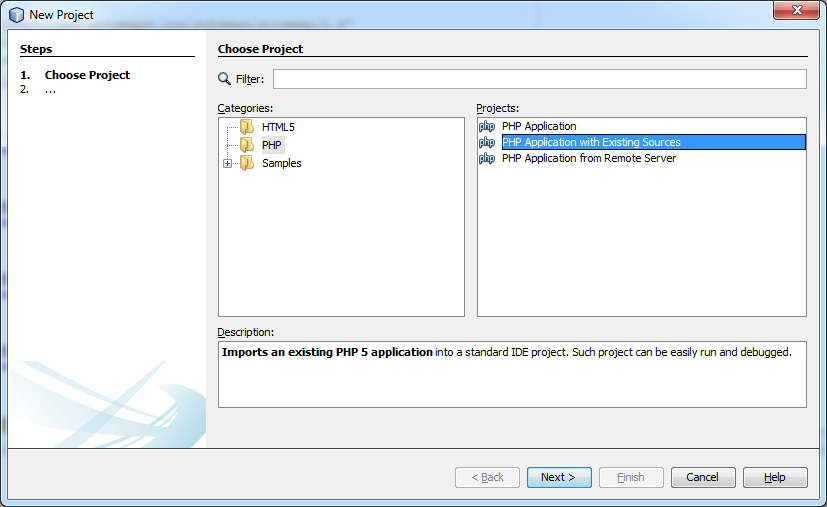
Right click in the projects section and create a New Project or select File -> New Project. Select PHP Application with Existing Sources.
Step 2: Project Sources
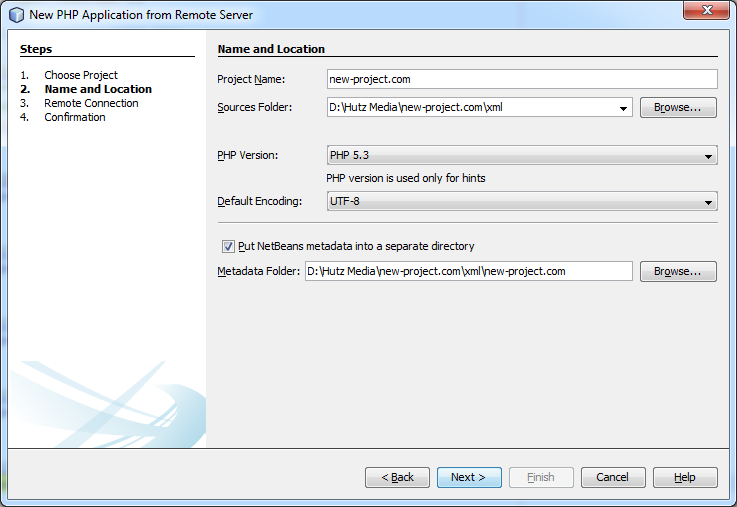
Type in your project name: “new-project.com”. Put the project metadata in a separate folder so that it doesn’t get uploaded to the server. Click “Finish”.
Step 3: Remote Connection
In this step we will configure your new project to automatically upload to the development server whenever a file is changed.
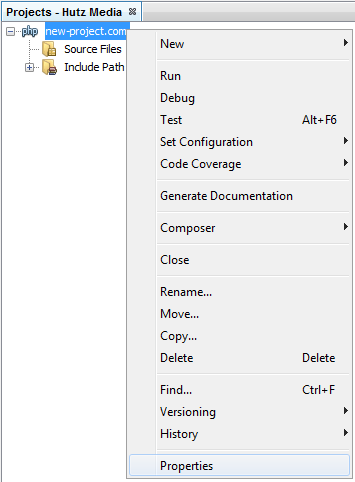
Right click your project and select “Properties”.
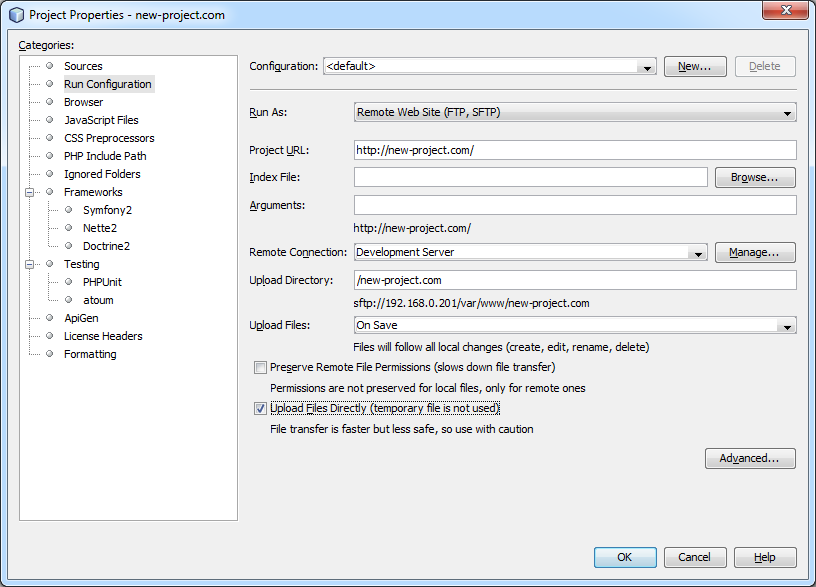
Under “Run Configuration” change “Run As” to “Remote Web Site (FTP, SFTP)”.
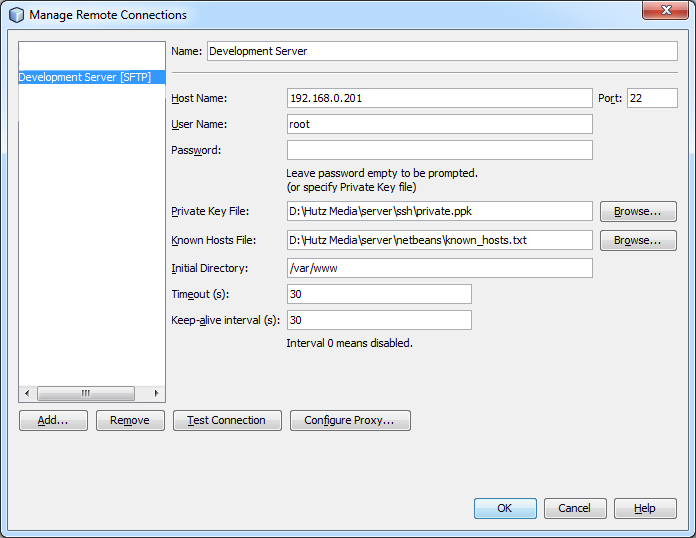
Add a new “Remote Connection” by clicking on “Manage”.
Enter in the host name of your development server that you configured previously. Select the private key that you created previously. Make sure you select the .ppk version of the private key that PuTTYgen outputs by default.
Create or select a Known Hosts File. If you don’t have a known hosts file yet just create an empty text file somewhere.
Change “Upload Files” to “On Save” and check “Upload Files Directly (temporary file is not used)”.
If everything is setup correctly you should now be able to work with NetBeans IDE with your project files on your local computer. Whenever you make changes they will automatically be uploaded to your development server.


