Installing an SSL Certificate for your website
Why do I need an SSL Certificate?
An SSL certificate is a beneficial for every kind website. It is one of many important security features that limit the interception of sensitive data that is transferred between the client (browser) and the server (your website).
Even websites that don’t transmit sensitive data can benefit from an SSL certificate with a small SEO boost on Google searches. When setup correctly, an SSL certificate will show a green lock icon in the location bar of the browser which will increase the confidence of your clients when they are visiting your website.
1. Preparing the server
If you haven’t done so already install the required software and modules onto your server.
yum install mod_ssl openssl
2. Create the signing request and private key
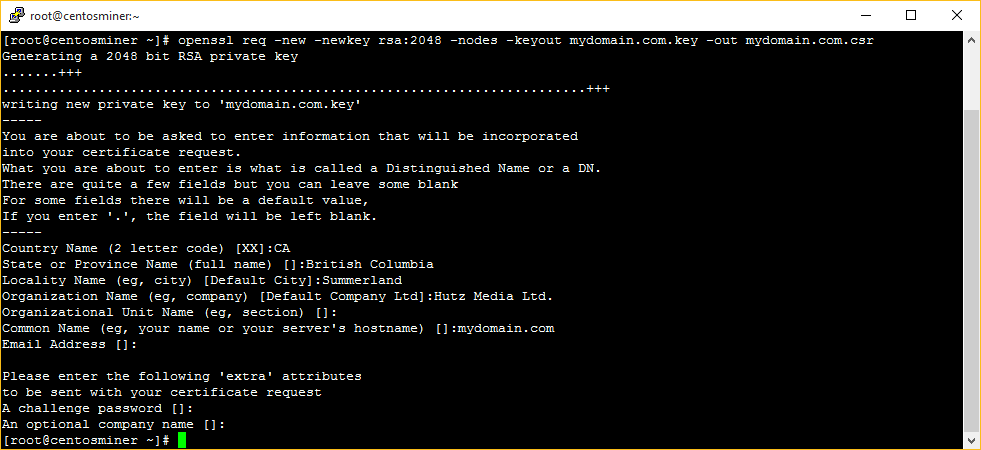
The following command will create a new private key and a certificate signing request (CSR). The private key should be treated like a password and always have secure file permissions (read only).
openssl req –new –newkey rsa:2048 –nodes –keyout mydomain.com.key –out mydomain.com.csr

Move the private key to where the key files are stored. On CentOS, the correct location for the private key is /etc/pki/tls/private.
mv mydomain.com.key /etc/pki/tls/private/
3. Upload CSR
Now that you have a private key and signing request, you need to get the public key generated using a Certificate Authority (CA).
Purchase an SSL Certificate from a trusted vendor and when prompted, upload the CSR file that you generated in the previous step.
When setting up a new SSL Certificate you may need to provide proof of your or your company’s identity first. Depending on the type of certificate this can be a long drawn out process with phone calls and faxes or as simple as verifying your email address.
If there are no errors, your signed certificate will be emailed to you. Copy the downloaded public key to your server and move it to where public keys are stored.
mv mydomain.com.crt /etc/pki/tls/certs/
4. Configure Apache
If you haven’t done so already configure Apache to listen to port 443 (don’t forget to open up 443 on your server’s firewall).
vim /etc/httpd/conf/httpd.conf
NameVirtualHost *:443
Add a new virtual host entry for your domain. Remember to disable SSLv3 and SSLv2 because they are vulnerable. You should also configure apache to avoid allow weak ciphers such as ADH.
If you want to support the majority of the web, SSL Certificates are limited to one per IP Address.
Your configuration should look something like this:
<VirtualHost IP_ADDRESS:443>
    DocumentRoot "/var/www/vhosts/mydomain.com/public"
    ServerName mydomain.com:443
    ServerAlias www.mydomain.com:443

    SSLEngine on

    SSLCipherSuite ALL:!ADH:!NULL:!EXP:!SSLv2:!LOW:!MEDIUM:RC4+RSA:+HIGH
    SSLProtocol -ALL +TLSv1 +TLSv1.1 +TLSv1.2

    SSLCertificateFile /etc/pki/tls/certs/mydomain.com.crt
    SSLCertificateKeyFile /etc/pki/tls/private/mydomain.com.crt
</VirtualHost>
When you are finished restart apache and test your server.
service httpd configtest
service httpd restart


